Die Dimensionierung von Villa-Kronleuchtern sollte mit dem Raumvolumen beginnen, weil Grundrissmaße allein die Wirkung von Höhe übersehen. Ein 16 mal 20 Fuß großer Raum mit 10 Fuß Decke und ein 16 mal 20 Fuß großes Foyer mit 20 Fuß Decke brauchen nicht dieselbe visuelle Präsenz, obwohl ihre Grundrisse gleich sind.
Die Volumenformel ist kein finaler Standard. Sie ist eine praktische Starthülle, die Eigentümern, Innenarchitekten und Herstellern hilft, Durchmesser, Fall, vertikale Füllung, Raumrolle und Abstand zu besprechen, bevor Sonderzeichnungen freigegeben werden.
Kinglong Lighting kann Raummaße, Fotos und Deckendaten nutzen, um die Formel in eine projektspezifische Kronleuchtergrößen-Empfehlung mit Visualisierung, Materialnachweis und Installationsannahmen zu übersetzen.
Wichtigste Erkenntnisse
- Basisformel: Länge plus Breite in Fuß addieren und als ungefähren Durchmesser in Zoll lesen.
- Höhenkorrektur: Für Decken über 10 Fuß vertikale Präsenz hinzufügen, aber durch Abstand und Raumrolle begrenzen.
- Raumfaktor: Essen, Foyer, Treppe und Wohnzimmer brauchen unterschiedliche Korrekturfaktoren.
- Finale Freigabe: Das Formelergebnis muss gegen Sichtlinien, Blendung, Stützung und Reinigung geprüft werden.
- Kinglong-Ablauf: Die Formel wird nützlich, wenn sie mit Mofun-Visualisierung und Freigabedatei verbunden wird.
Die Formel liefert eine Starthülle
Die beste Größenformel für Villa-Kronleuchter ist ein Gesprächsanfang, kein Ersatz für Zeichnungen und Blickpunktprüfungen.
Die IES Illuminance Selector FAQ erklärt, dass Beleuchtungskriterien an Anwendung und Sehaufgabe gebunden sind. Das ist eine nützliche Erinnerung für Kronleuchtergrößen: Eine Formel kann visuellen Maßstab schätzen, aber Aktivität und Blickpunkt entscheiden, ob diese Größe angenehm ist.
Nutzen Sie diese Szenarioformel für frühe Planung: Startdurchmesser in Zoll entspricht Raumlänge in Fuß plus Raumbreite in Fuß plus zweimal Deckenhöhe über 10 Fuß. Wenn die Decke 10 Fuß oder niedriger ist, nutzen Sie nur Länge plus Breite als Basis. Dies ist eine illustrative Planungsmethode, kein Baucode und keine universelle Designregel.
Beispiel 1: Ein 16 mal 20 Fuß großes zweigeschossiges Foyer
Länge plus Breite ergibt 36 Zoll. Die Decke ist 20 Fuß hoch, also beträgt die Höhenkorrektur 2 x 10 = 20 Zoll. Der Startdurchmesser wird 56 Zoll. Das bedeutet nicht, dass der Kronleuchter zwingend 56 Zoll breit sein muss. Es bedeutet, dass die visuelle Präsenz wie eine 56-Zoll-Leuchte wirken sollte, bevor Stil- und Abstandskorrekturen greifen. Für die Größenentscheidung sollten Basiszahl, Korrekturfaktor, Abstandsgrenze und Designübersetzung zusammenbleiben, damit die finale Größe nachvollziehbar ist und nicht als persönliche Vorliebe verteidigt werden muss.
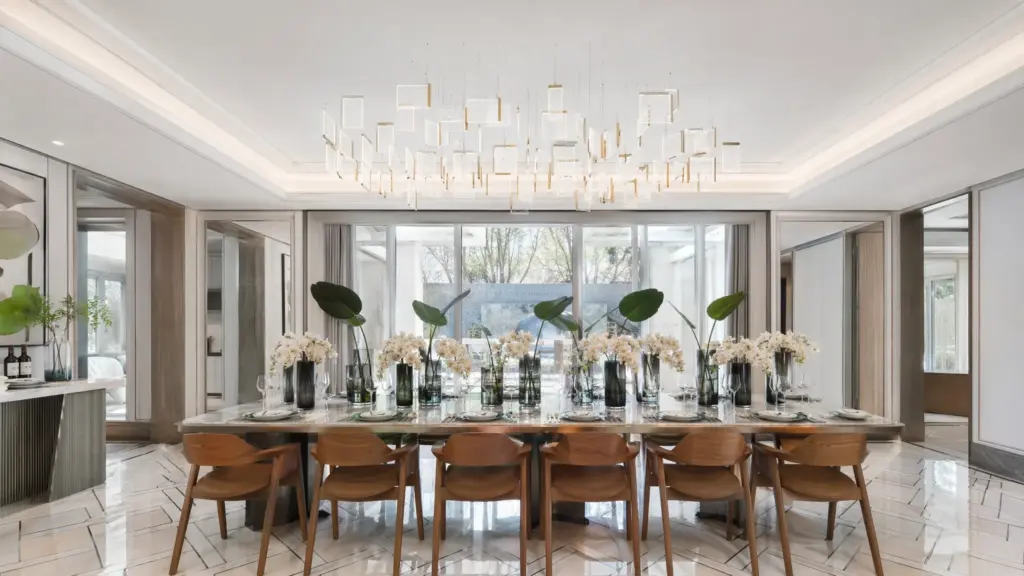
Beispiel 2: Ein 14 mal 18 Fuß großes Esszimmer
Länge plus Breite ergibt 32 Zoll. Wenn die Decke 11 Fuß hoch ist, fügt die Höhenkorrektur 2 Zoll hinzu und erzeugt einen Startpunkt von 34 Zoll. Esszimmer sollten jedoch dem Tisch folgen, nicht nur dem Raum. Eine lineare Leuchte oder eine Paarung kann besser funktionieren als ein einzelner breiter Körper. Auch hier sollten Basiszahl, Korrekturfaktor, Abstandsgrenze und Übersetzung gemeinsam stehen, damit erkennbar bleibt, welche Einschränkung das Ergebnis verändert hat.
Die Formel wird in beiden Beispielen absichtlich als Bereich behandelt. Sie gibt keine Aussage über Kristalldichte, Schirmdurchmesser, Lichtaustritt, Reinigung oder Blick aus benachbarten Räumen. Ein 34-Zoll-Startpunkt kann bei dichtem Kristall zu schwer wirken und bei offener Metallstruktur zu klein. Deshalb sollte die Zahl immer mit Materialdichte und Abstandsfeld gelesen werden.
Einen Raumrollen-Faktor anwenden
Der Raumrollen-Faktor verhindert, dass die Formel jeden Villenraum wie ein Foyer behandelt. Höhe zählt, aber Nutzung zählt mehr. Ein Kronleuchter über dem Esstisch sollte nicht breit werden, nur weil die Decke hoch ist.
| Raumtyp | Startfaktor | Warum er sich ändert | Korrektur vor Freigabe |
|---|---|---|---|
| Esszimmer | 0,80-0,95x | Tisch und sitzende Sichtlinien dominieren | Tischkante und Fallhöhe prüfen |
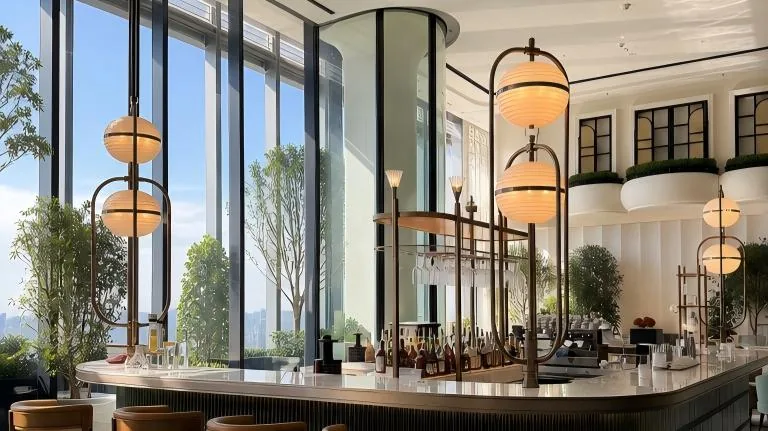
| Zweigeschossiges Foyer | 1,00-1,15x | Ankunftsvolumen braucht Präsenz | Eingang, Treppe und Podest prüfen |
| Treppenluftraum | 0,85-1,10x | Höhe zählt mehr als Breite | Vertikalen Rhythmus und Abstandsgrenze nutzen |
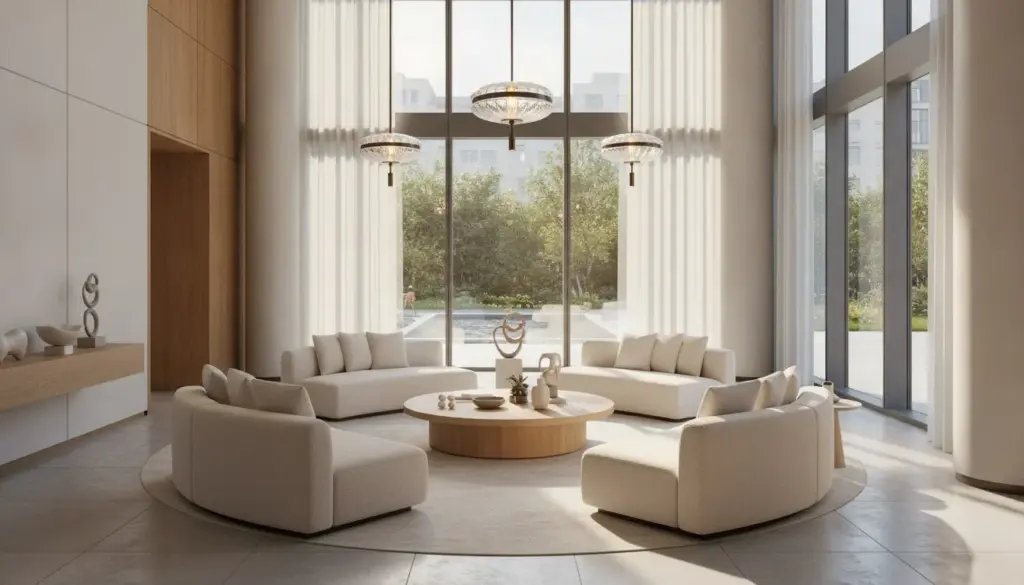
| Wohnzimmer | 0,85-1,00x | Komfort und Sitzblendung zählen | Bildschirme, Kunst und Reflexflächen prüfen |
Das Formelergebnis muss durch reale Abstände begrenzt werden. Die IES Lighting Library enthält Praxisreferenzen für Wohn- und Gastgewerbebeleuchtung, aber auch starke Designhinweise brauchen projektspezifische Maße.
Typische Abstandsgrenzen sind enge Raumbreite, Treppenöffnung, Tisch-Sitzzone, niedrige Unterzüge, Fensterblick und Zugang für einen Reinigungslift. Wenn die Formel eine Grenze verletzt, verschieben Sie visuelle Präsenz in Höhe, Abstand, Materialdichte oder eine Mehrpunktkomposition.

Blendung, Farbe und Sicherheit können die Formel überstimmen
Ein Kronleuchter kann mathematisch korrekt und visuell unbequem sein. Hohe Kristalldichte, offene Lampen, poliertes Metall, Spiegelwände oder ein nahes oberes Podest können Blendung erzeugen. Die DOE-FAQ zu TM-30 ist nützlich für Farbqualitätsdiskussionen, aber Komfort hängt auch von Helligkeit, Abschirmung, Reflexionen, Dimmung und Blickwinkel ab.
Sicherheitsnachweise gehören ebenfalls in das Größengespräch. UL Solutions weist darauf hin, dass Innen- und dekorative Beleuchtung häufig nach UL 1598 und UL 8750 geprüft wird. Bei maßgefertigten Kronleuchtern werden fertige Leuchte, LED-Ausrüstung, Aufhängung und Installationsannahmen wichtiger, je größer das Objekt wird.
Der DOE-Leitfaden zu Wohnbeleuchtung bestätigt, dass Lichtqualität Blendkontrolle, Ambiente-Strategie, Essnutzung und Dimmung umfasst. Eine Kronleuchterformel sollte daher in den breiteren Beleuchtungsplan integriert werden, nicht als isolierte Dekorregel dienen.
Wie Kinglong Lighting die Formel anwenden kann
Kinglong Lighting kann die Formel als frühes Größenwerkzeug nutzen und sie anschließend über die Mofun-Designplattform, Materialmuster, Zeichnungen und den Sonderleuchten-Ablauf verfeinern. Käufer sollten Raummaße, Deckenhöhe, Fotos, Planzeichnungen, Möbelplan, bevorzugten Stil, Materialpalette und Zugangsbeschränkungen liefern.
Der praktische nächste Schritt ist, diese Maße über die Größenprüfung für Villa-Kronleuchter einzureichen. Bitten Sie Kinglong Lighting um einen Formel-Startwert, einen korrigierten Größenbereich, eine visuelle Hülle und eine Checkliste für Freigabenachweise. So bleibt das Gespräch konkret und lässt dennoch Raum für Designurteil.
Die Prüfung sollte außerdem die eine Einschränkung benennen, die Vorrang hat. Im Foyer kann das Ankunftsvolumen sein. Im Esszimmer kann es das Tischfeld sein. Im Treppenauge kann es Podestkomfort sein. Eine benannte Priorität verhindert, dass die Formel in mehrere Richtungen gleichzeitig korrigiert wird.
Diese Priorität sollte sichtbar neben der Formel stehen. Wenn ein Esszimmer durch Tischlänge begrenzt wird, darf die Deckenhöhe nicht heimlich wieder Breite hinzufügen. Wenn ein Treppenauge durch Podestkomfort begrenzt wird, sollte zusätzlicher Maßstab eher über vertikale Staffelung oder Materialdichte entstehen. So bleibt die Formel ein Werkzeug für Entscheidungen und nicht eine Zahl, die jede neue Meinung neu auslegt.
Die Formel mit Einschränkungen korrigieren, bevor die Zahl vertraut wird
Die Formel wird erst nach Korrektur nützlich. Erstens: Startdurchmesser berechnen. Zweitens: Raumrollen-Faktor anwenden. Drittens: engstes sicheres Feld identifizieren. Viertens: entscheiden, ob fehlende Präsenz mit Breite, Höhe, Dichte oder mehreren Punkten gelöst werden sollte. Diese Reihenfolge verhindert einen häufigen Fehler: Durchmesser zu erhöhen, obwohl der Raum vertikalen Rhythmus oder bessere Lichtverteilung braucht.
Ein Villa-Foyer braucht vielleicht mehr Höhe als Breite. Ein Esszimmer braucht vielleicht mehr Länge als Durchmesser. Ein Treppenluftraum braucht vielleicht eine schlanke Kaskade statt eines runden Körpers. Eine Lounge braucht vielleicht eine kleinere Leuchte mit wärmerer Dimmung und stärkeren Ambienteebenen. Die Formel weiß nichts davon, bis der Designer Raumrolle, Möbel, Sichtlinien und Wartungsgrenzen hinzufügt.
Kinglong Lighting kann die Formel als ersten Durchgang in einer Projektprüfung nutzen und das Ergebnis danach in Mofun oder einem Zeichnungspaket testen. Die finale Empfehlung sollte ein Bereich sein, nicht eine einzelne Zahl: maximal sicherer Durchmesser, bevorzugte visuelle Präsenz, Fallbereich, Materialdichte, Blendnotiz, Aufhängungsannahme und Reinigungszugang. Dieser Bereich macht aus einem Größen-Trick ein fertigbares Kronleuchter-Briefing.
Der Bereich sollte als Entscheidungshülle geschrieben werden. Ein Foyer kann zum Beispiel 900 bis 1.100 mm Breite erlauben, aber die bevorzugte visuelle Präsenz kann aus einem 900-mm-Körper mit höheren Ebenen statt aus einem 1.100-mm-Ring entstehen. Ein Esszimmer kann eine lange lineare Leuchte akzeptieren, aber der nutzbare Bereich ändert sich, wenn Stühle, Kunst, Sideboards und Fallhöhe einbezogen werden. Die Formel liefert die erste Zahl; die Hülle erklärt, warum die finale Antwort anders ist.
Wichtig ist auch, scheinbare Größe von physischer Größe zu trennen. Klares Glas, offenes Metallwerk und schlanke Arme können leichter wirken als ihr gemessener Durchmesser. Dichtes Kristall, dunkle Oberflächen und schwere Schirme können größer wirken als das Maßband sagt. Eine Villa-Kronleuchter-Größenformel sollte deshalb durch visuelle Dichte, Oberflächenkontrast und Helligkeit korrigiert werden, besonders in Räumen mit starkem Tageslicht oder reflektierendem Stein.
Der stärkste Nutzen der Formel ist interne Abstimmung. Eigentümer, Designer und Hersteller können endlos darüber streiten, ob ein Kronleuchter groß genug wirkt. Ein dokumentierter Bereich verändert dieses Gespräch. Das Team sieht Basisrechnung, Raumrollen-Korrektur, Abstandsgrenze und gewählte Designübersetzung. Dadurch lässt sich die finale Leuchte leichter freigeben, fertigen, versenden, installieren und verteidigen.
Dieser dokumentierte Bereich sollte auch zeigen, was nicht aus der Formel stammt. Wenn die Leuchte kleiner wird, weil ein Treppenpodest eng ist, gehört diese Ursache neben die Zahl. Wenn sie größer wirkt, weil helle Glasarme wenig visuelles Gewicht haben, gehört diese Materiallogik ebenfalls in die Freigabe. So bleibt die Formel nachvollziehbar, obwohl das finale Maß projektbezogen korrigiert wurde.
| Korrekturschritt | Frage | Ausgabe |
|---|---|---|
| Basisformel | Was legt das Raumvolumen nahe? | Startdurchmesser |
| Raumfaktor | Welche Aufgabe hat die Leuchte? | angepasster Bereich |
| Abstandsgrenze | Was kann der Raum sicher aufnehmen? | maximale Breite oder Fallhöhe |
| Designübersetzung | Wie soll Präsenz ausgedrückt werden? | Breite, Höhe, Dichte oder Gruppe |
Volumenformel-Aktionskarte
- Länge, Breite, Deckenhöhe und engstes sicheres Feld messen.
- Startdurchmesser vor Stilkorrekturen berechnen.
- Raumrollen-Faktor für Essen, Foyer, Treppe oder Lounge anwenden.
- Größe durch Abstand, Sichtlinien und Wartungszugang begrenzen.
- Finalen Bereich in Zeichnungen und Musternachweis übersetzen.
Verwandte Leitfäden
- Kronleuchter für zweigeschossige Foyers auswählen
- Kronleuchter im Esszimmer spezifizieren
- Leitfaden für Luxus-Villa-Kronleuchter
Das Raummaß-Größenmodell vor finaler Freigabe aufbauen
Für eine Villa-Kronleuchter-Größenformel ist Anwendungskontext nützlicher als dekorative Vorliebe. Die praktische Frage lautet, ob Eigentümer, Innenarchitekt, Sonderleuchtenlieferant und Installateur sich darauf einigen können, was vor Freigabe bewiesen werden muss. Die Antwort ist ein kurzes Paket, das Designabsicht, Betriebsrisiko, Nachweis und Verantwortung in ein gemeinsames Freigabegespräch übersetzt.
Das Hauptrisiko besteht darin, eine Formel als Dekorationsmathematik zu nutzen, während Sichtlinien, Deckenhöhe, Möbel, Blendung und Wartungszugang das Ergebnis verändern. Es ist am stärksten, wenn eine schöne Leuchte von den Nachweisen getrennt wird, die sie baubar, wartbar und sicher freigabefähig machen. Aus einer 6-Tore-Prüfung gerechnet, lassen 3 offene Tore von 6 etwa 50 Prozent der Freigabelogik offen; das ist für eine Maßleuchte zu viel Unsicherheit.
Basisformel von finaler visueller Größe trennen
Die erste Freigabefrage sollte definieren, wie die Formel genutzt wird. Es geht nicht darum, ob ein Kronleuchter isoliert hochwertig aussieht, sondern ob der gewählte Ansatz Raumrolle, Gäste- oder Eigentümererlebnis, Betriebsrealität und Produktionsübergabe gleichzeitig schützt. Die Freigabenotiz sollte Entscheider, erwarteten Nachweis und die Änderung nennen, die eine Neukonstruktion erzwingen würde. So kann der Käufer eine verführerische Option aus einem konkreten Grund ablehnen.
Für Deckenhöhe und Möbelzone korrigieren
Der erste Fehlerpunkt entsteht meist dort, wo visuelles Versprechen auf tägliche Nutzung trifft. Aus dem 6-Tore-Raummaßmodell gerechnet, erzeugt 1 schwaches Tor bei 3 nachgelagerten Teams drei Prüfpfade, die durch einen fehlenden Nachweis verzögert werden können. Die Prüfung sollte die Ansicht oder Nutzungsbedingung enthalten, deren spätere Korrektur am teuersten wäre. Szenenverhalten und Kontext sollten geprüft werden, bevor die Leuchte als freigabereif gilt.
Größe begrenzen, wenn Abstand oder Blendung dominieren
Lieferantennachweise sind nur nützlich, wenn sie zum kontrollierten Risiko passen. Die Anfrage sollte dieses Risiko in Nachweise übersetzen: Raummaße, visuelle Hülle, Korrekturfaktoren, Materialdichte, Abstandsgrenze und Wartungsnotiz. Wenn das Risiko Maßstab ist, fordern Sie markierte Ansicht und Sichtlinie an. Wenn das Risiko Farbe ist, fordern Sie Materialmuster unter Zielszene an. Wenn das Risiko Wartung ist, fordern Sie Reinigungsroute und Ersatzteillogik an.
Den Korrekturfaktor in die Freigabedatei schreiben
Der Projektablauf von Kinglong Lighting bewegt maßgefertigte Hotel- und Villa-Kronleuchter durch Zeichnungen, Muster, Fertigung, Verpackung, Versand und Montage. Die finale Übergabe sollte sagen, was freigegeben ist, was flexibel bleibt und wer eine Änderung ablehnen darf. Praktisch sollte das Freigabepaket mindestens 6 benannte Tore und je einen Verantwortlichen enthalten. So wird ein späterer Vorschlag nicht zur Neukonstruktion, nachdem die Leuchte bereits in Produktion gegangen ist.
Häufige Fragen
Was ist die einfachste Größenformel für Villa-Kronleuchter?
Die einfachste Startformel ist Raumlänge plus Raumbreite in Fuß, gelesen als ungefährer Durchmesser in Zoll. Für Decken über 10 Fuß fügen Sie eine Höhenkorrektur hinzu und korrigieren danach nach Raumrolle, Abstand, Möbelplan und Wartungszugang.
Verändert die Deckenhöhe den Kronleuchterdurchmesser?
Deckenhöhe verändert visuelle Präsenz, aber nicht immer den physischen Durchmesser. Ein höherer Raum braucht vielleicht eine längere oder dichtere vertikale Komposition statt einer breiteren Leuchte. Nutzen Sie Höhenkorrektur als Startpunkt und begrenzen Sie Breite durch Wege und Sichtlinien.
Wie dimensioniere ich einen Kronleuchter für ein Esszimmer?
Beginnen Sie mit Raummaßen, priorisieren Sie aber den Tisch. Prüfen Sie Tischlänge, Tischbreite, Sitzabstand, Fallhöhe und Blickkontakt. Ein Esszimmer-Kronleuchter sollte proportional zum Tisch und angenehm für sitzende Gäste sein.
Wann sollte ich die Formel verlassen und Zeichnungen anfordern?
Fordern Sie Zeichnungen an, wenn der Raum zweigeschossig ist, die Leuchte maßgefertigt wird, der Kronleuchter schwer ist, Treppen- oder Tischabstand eng ist oder der Eigentümer genaue Material- und Dimmfreigabe braucht. Die Formel dient der frühen Größe, nicht der Produktionsfreigabe.